


Back in the day: An Introduction to the Article Series

By Dave Westlake
Do you remember your first big challenge? I do. Picture the scene: the year is 1990 and it’s about a decade before I started rock climbing. My younger self is sitting quietly on the picnic bench, getting psyched for another attempt at my project*. In ten minutes the bell will ring, signalling the end of another lunch break destined to slip by without success. The other kids had all cruised it, some of them even doing laps just for fun. But as I stared towards the monkey bars, the idea of lurching across them seemed about as unlikely for me as Font 8C does today. The nervous anticipation I feel as I approach that first rung will be very familiar twenty years later, and so will the wilting sensation that engulfs my arms as I snatch for the third. Just like before, I run out of gas less than half way across. The bell rings and I begin the long walk back across the playground to class, picking off the pieces of wood chipping from my jumper as I go. Before I cross the threshold of an irretrievable tangent, I should probably reveal the point behind this little anecdote. As you will have already deduced from reading the above, I am a natural born weakling. Clearly, this is not the most desirable attribute to have if you harbour any kind of climbing ambitions. But luckily for people like me there are a vast array of cunning tricks, collectively known as technique, which can help us scale some very unlikely-looking steep overhangs and blank arêtes.
This series of short articles focuses on technique and is aimed at helping beginner and intermediate climbers unlock some of the fundamentals of movement for three of the most common styles of climb – overhangs, slabs and arêtes. Of course, technique is only one part of the equation and in order to deploy many of the technique tricks successfully you will need to work on specific aspects of strength and agility. For example, using your feet effectively on steep ground requires some strength in your core and abdominal muscles. Hopefully though, by giving you a ‘technique framework’ to fit your strength training into you will find it easier to remain focussed on the best ways to improve. The format is simple, presenting a quick rundown of the key points, then some tips for training and finally some classic routes and boulder problems to go and test out your skills. Incidentally, and I’m sure you’ve been wondering, I did eventually conquer the monkey bars in the school playground. Having failed repeatedly to campus along the underside, I decided to take the scarier but far less powerful route of climbing up the side and crawling along the top! Thinking now about my gravitation towards bold traditional routes rather than powerful bouldering, I often look back on this episode as a metaphor for how my climbing would develop all these years later. I hope you enjoy reading the articles and that they prove useful for your climbing over the coming months. *As an 8 year old, climbing nomenclature was yet to permeate my mind so I was unaware that I was ‘psyched’ or that I had a ‘project’ - but this is beside the point!
Article 1: Technique tips for climbing overhangs.
(Links to 'Article 2 – Slabs' & 'Article 3 - Arêtes' at the base of the page)
Grab the grips and twist your hips!
Probably the most important technique tip you will find, and applicable for all types of climbing, is to be aware of your centre of gravity and keep your hips close to the wall. There is always a catch, though, and doing this is harder the steeper the wall is - and can become very difficult on overhanging rock. Essentially, the theory behind this is that our legs are stronger than our fingers and arms so if we can keep our arses from hanging out too far then our bodyweight is distributed towards our feet as much as possible. To keep your hips close on steep ground you will find that twisting them helps. This is a key ingredient of the drop knee, which brings me nicely on to our next nugget of technical wisdom...

Drop your knees like an Egyptian
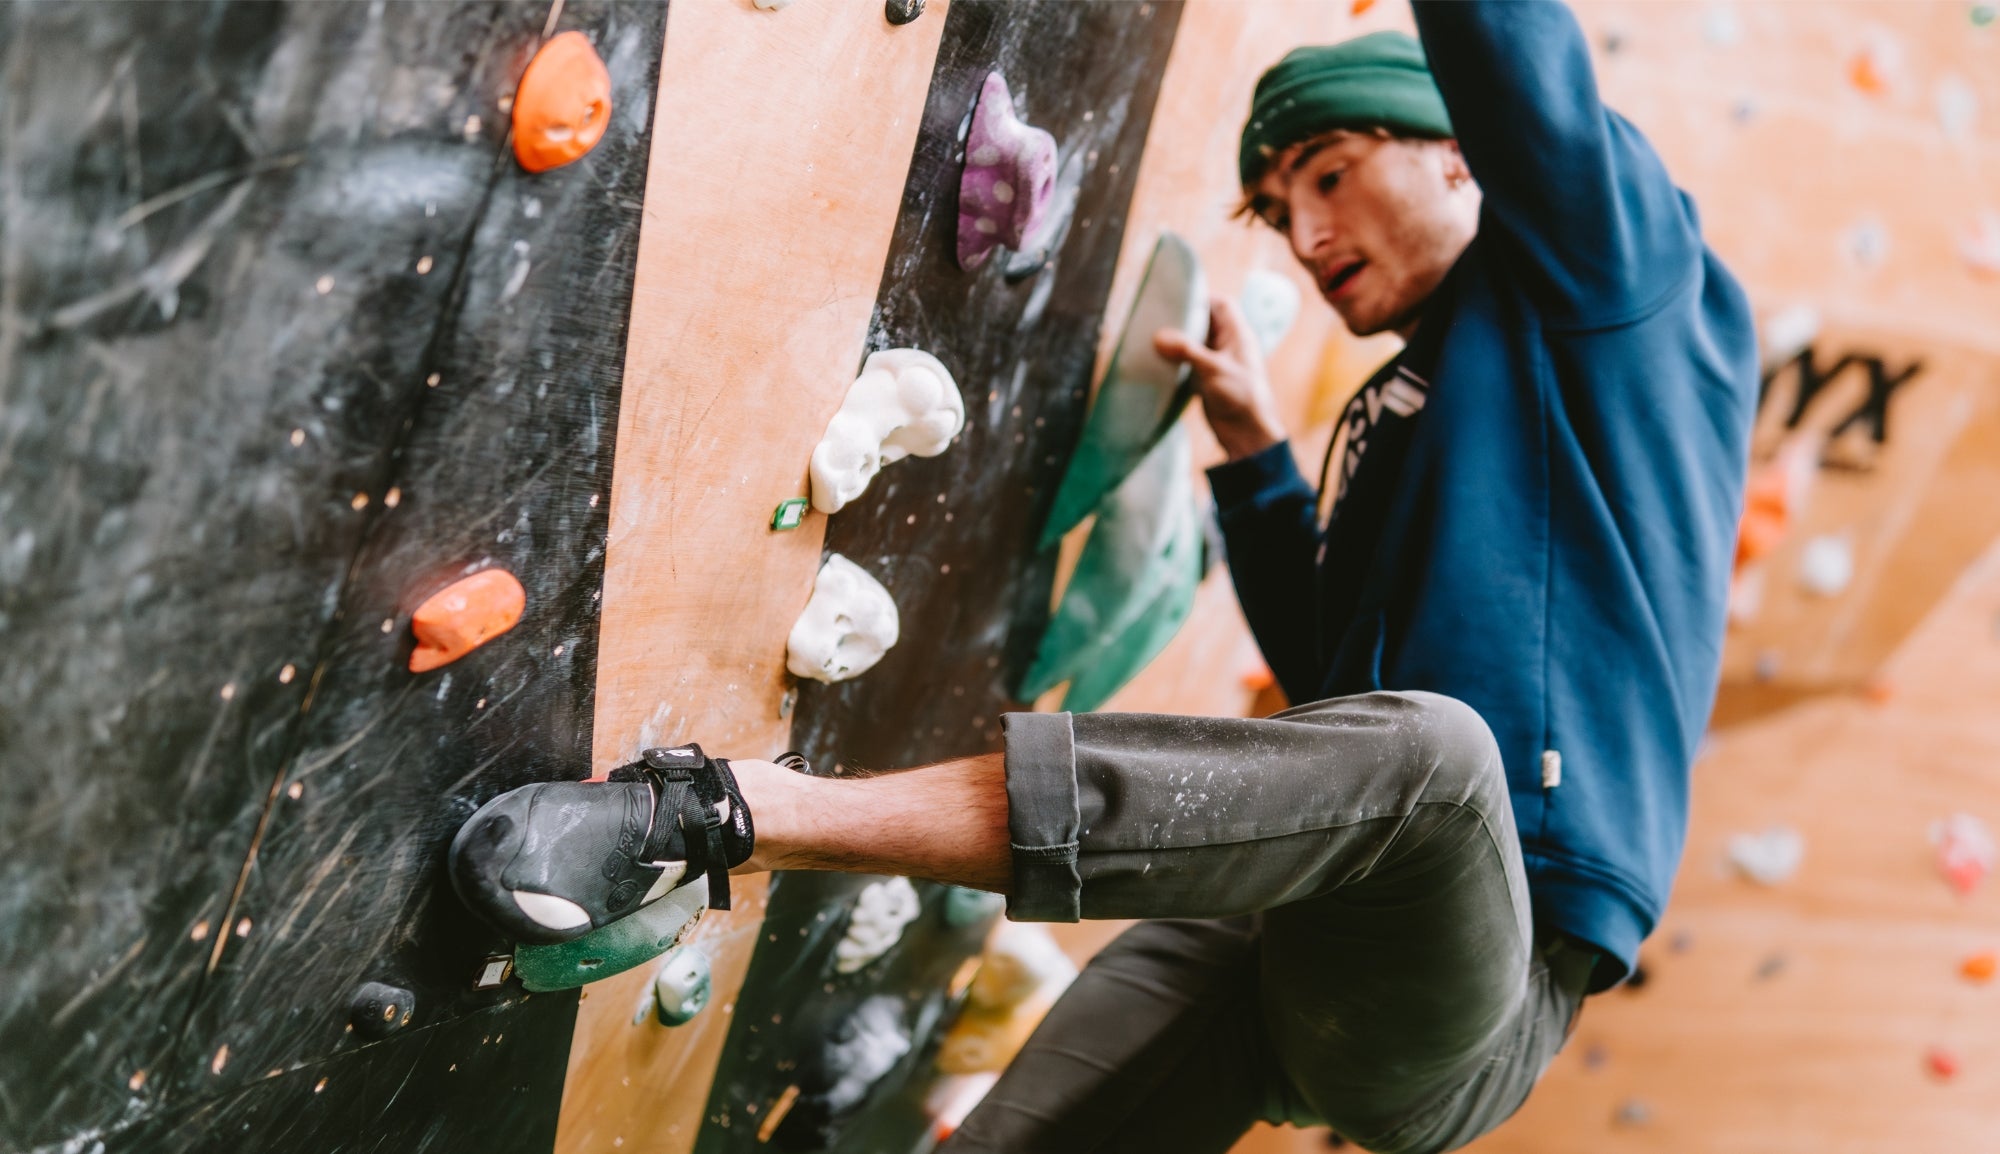
If you observe good climbers on overhanging problems or routes you will likely notice that they continually twist and turn, keeping their hips close by twisting one knee inwards. Sometimes called ‘Egyptian-ing’ this can be anything from a subtle hip movement to a full on leg-inverting display of contortion [See image]. It can also be performed in a slow ‘locking’ manner or a quick burst of movement depending on the move and the holds involved. The benefit is that doing this can help you reach much further using less power than you could if you maintained a square on position.
Pretend your feet are hands
A good piece of advice to bear in mind for all types of climbing, you will find this one particularly important when desperately trying to claw at a foothold irritatingly positioned a horizontal body-length away. Keeping your feet on is key on overhangs as relying on the handholds alone will rapidly hasten the arrival of incapacitating fatigue! Pressing hard on your toes is a good way to start, although you may find it necessary to work on strengthening your core muscles for this to be really effective.  In the meantime, using our feet in other ways can also make a big difference. Hooking with my toes and heels has helped keep my feet on many a steep wall, and it is always worthwhile checking if there are any hidden holds or opportunities for this kind of ‘fancy footwork’. On a steep boulder problem I climbed recently, I found the only way to prevent my feet coming off and hitting the mat was to cam the heel and toe of my right foot in a gap just next to the hold I was toe hooking with my left. I even had to go through a few different shoes to find one that was the right size and shape for the foot to feel secure. On the topic of shoes, those who find themselves advancing through the grades may well find that a downturned pair will help in maintaining foot contact when the going gets horizontal. It is also worth choosing a pair with some rubber on the top of the toe as this makes a big difference on toe hooks.
Play it straight (armed)
On longer routes, the chances are you will need to pause for a breather from time to time. In the absence of a big picnic ledge halfway up the route (if only!), your resting procedure may need to get a little inventive. Drop-knees can do a lot for taking the weight off your arms for a moment, as can bridging your feet as wide as possible. Whatever position you get into when you take a quick rest try to hang with a straight arm, as this will use less energy and help you recover faster. Alternating arms will allow you to ‘shake’ the lactic acid out of the other one but be careful to give each arm sufficient rest otherwise they may end up more tired than when you got there. As a general rule, when you first get to the rest, or ‘shake-out’ position, alternate arms quickly. Then, as you begin to recover, take a bit longer for each shake before speeding things up again as you prepare to set off.Pulling it all together
 Trying to incorporate the above into your everyday climbing should open up a whole new world of possibilities. The real epiphany, however, will come when the techniques above start to meld into your instinctive movement. Drop-knees and pulling with your toes should eventually become second nature, and the trick is to try and incorporate all the aspects of refined technique into a fluid and smooth movement. This is easier said than done, and will come more naturally to some people than it will to others. Once again, though, practice is the key. Being aware of your body position and focussing on making smooth transitions from one position to the next will perhaps aid your improvement more than anything. Hopefully you will have this dialled by next time, as the ability to move smoothly is never more important than on a big blank slab...! Training for overhangs...
Core Strength
Effective footwork on steep ground requires good core strength, so sit ups and leg raises are what you should prioritise here. Hanging off a bar and lifting your legs up to 90 degrees and back down is a good start as it will also keep your arms ticking over. When these start to feel easy, experiment with holding the “L” position for longer, or adding ankle weights. Then, in time, it might make sense to progress onto trying a front lever...
Classics overhangs to aim for...
Flying Buttress Direct (E1 5b) Stanage, Peak District: A great route for wannabe heroes – the centrepiece of the popular end of Stanage is a great choice for the competent to practice good overhang technique. The Sloth (HVS 5a) The Roaches, Staffordshire: Even steeper, this route is everything my monkey bar nightmares were made of! The top of the wall is a good place to practice the straight arm rest before you head out into the unrelenting steepness beyond. creaming Slave (7B/V8 ) Woodwell, South Lakes: A good and hard problem that is surrounded by other steep possibilities. Alternative 3 (6A/ V3), Wright’s Rock, Churnet Valley: Very steep but with good holds, this weatherproof gem is a real beauty. It also has the added bonus of a V5 sit start to get your teeth into after doing the stand up version.