


By Neil Gresham
For those climbers who have already gained a solid foundation of strength through bouldering, the next obvious step if you're keen to crank your power training up another gear is to experiment with Campus boarding. Developed by the late legendary German climber, Wolfgang Gullich, the Campus board is an overhanging wooden board which starts at head height and is climbed footless using wooden rungs of varying thickness but consistent space intervals. These highly specialised facilities are simple in concept but highly effective in use, enabling an uncompromising level of intensity and training overload to be achieved. Unlike conventional bouldering, training gains on the Campus board can be easily assessed, owing to the low technique element and highly quantifiable nature of the exercises. However, beware the pitfalls of becoming obsessed with Campus training, not only are you increasing your susceptibility to injury, but your technique and body tension will suffer if you spend too much time with your feet swinging in space! Use it as a supplement rather than a substitute for bouldering and ensure that you adhere to the recommendations for warming-up and 'quality training' given in this article.
Areas of Development in Campus Board Training
Using a Campus board will enable you to develop the following vital components of climbing performance:- Contact finger strength (the ability to latch a hold at speed)
- Isometric ('hanging') finger strength (at a variety of different finger grips or angles)
- Explosive upper-body power (the ability to pull-up very fast and slap for the next hold)
- Neuromuscular timing (the ability to control and synchronise the firing of relevant muscles)
- Short term power endurance (if exercises are performed for durations of 40 to 60 seconds)
Campus Board Exercises
There are three main 'Campusing' exercises which are listed below in progressive order of intensity. If you are new to campus boarding you should introduce the exercises gradually over time and in the given order:
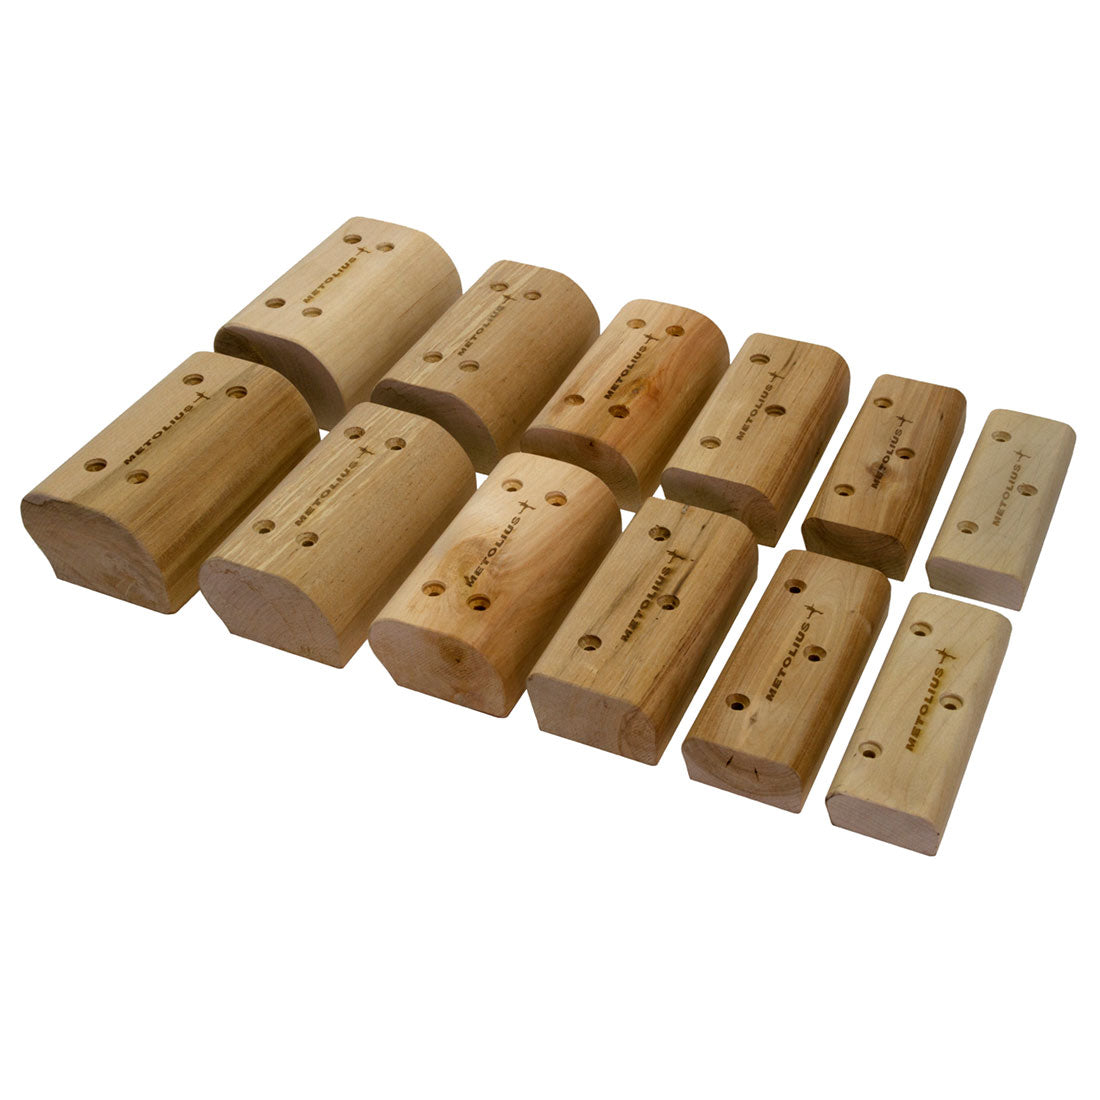
i) Laddering
The most basic and perhaps the most climbing-specific Campus board exercise, is simply to climb the board, footless, using alternate ladder rungs. Laddering is effective for training a potent combination of finger strength and upper body power. The objective is to increase the rung spacings as you progress and a Campus board with adjustable rungs will help greatly with this process. To assist in quantifying your training it is worth using the numbers on the rungs so that you can record your progress. See below for more information on varying your grip.
ii) Touches
This straightforward exercise provides a worthwhile alternative to the previous. Start by holding the bottom rung with both hands, now pull up and, with one hand, touch or hold the highest possible rung. If calibrated correctly, this will need to be done at speed using the 'deadpointing' (pull-up-&-slap) technique. Now, let go of the high rung and drop back down to catch yourself on the rung you started on with both hands. Repeat the process, leading with alternate hands each time you go. Continue until you fail to touch the high rung. To gain further benefit from this exercise you can try spending the minimum possible amount of time on the bottom rung in order to refine your power. Hence, the three simple measures of your improvements are your ability to do longer moves, your ability to do more moves, but most importantly your ability to perform sets at your existing level at greater speed.
iii) Depth Snatches (Plyometric training)
Plyometrics is the term used to describe one of the most advanced and specialised power training methods devised for athletic sports to date. In a Plyometric exercise the athlete must express explosive, reactionary power as a response to negative training movements. Plyometric training is very much speed orientated. Based on a plyometric exercise for sprinters called the depth jump, the main plyometric exercise for climbing is the reverse double-handed dyno or depth snatch. Start with both hands on one rung (say number 3 or 4) then drop with both hands simultaneously and catch a lower rung. If you have managed this, you must immediately pull-up as fast as possible and catch the starting rung simultaneously with both hands. The critical point is to minimise the amount of time spent on the bottom rung and hence to reduce the time it takes to absorb a negative force and turn it into a positive muscle contraction (known by training boffs as the 'amortisation phase'). The exercise is repeated to failure. As with touches, the training determinants will be rung spacing, repetition number and, most importantly, the speed of completion of a set. Clearly it is vital to calibrate your rung spacings correctly for this exercise.
Power Endurance Training
Stronger climbers can also use the Campus board for training 'short term' power endurance, either by using the larger ladder rungs, or by using closer rung spacing rungs on the smaller rungs. You will need to be capable of performing between approximately 15 and 30 repetitions to make this worthwhile. This type of training can be highly effective for developing the sort of extreme finger endurance that is tested to the limit when slapping your way up a desperately sustained sport route.
Training Tips
Vary the Grip - Isometric Finger Training
With bouldering you can simply train on different holds in order to gain versatile finger strength, but with Campusing you need to be more disciplined and force yourself to vary your grip. The 'half' crimp’ is the safest and most effective utility grip, yet it is vital to force yourself to experiment with the ‘full-crimp’ and ‘hang’ grips. A good ratio is to do 2 or 3 sets of half-crimp to 1 set of full-crimp and 1 set of hanging. Note that campus board rungs tend to be much more user friendly than 'tweaky' pockets on resin or rock for working the hang grip.
Quality Control
The potential risk of acute or repetitive strain type injuries is inherent with all Campus board training. Obey the following safety guidelines to minimise your susceptibility to injury and increase the productivity of your training. Warm-up thoroughly and progressively (pulse raiser, stretching, progressive bouldering. If you don’t have acces to bouldering then use your feet to assist you for warm-up sets.) Only train when feeling fresh, recovered and motivated. Emphasise quality: ie: 'less is more', take plenty of rest between sets and stop before you completely burn out. Use the strictest form and stop training as soon as you are unable to do so. Never allow your arms to fully straighten when absorbing the negative movements in Plyometric training. Even the strongest climbers will wish to perform no more than 3 Campus board sessions per week.
Building a Campus Board
Construction is relatively easy, and the typical ceiling height is usually sufficient. Here are a few decisions you need to make before you get started.
Location:
Basement or loft make good locations. If you want to build your training board in a living area, consider the dust from chalk, crash pad size, and a clear area around the base of the board for a fall zone.
- Height: Your board should be at least 200cm high at the top, but not more than about 250cm. Typical ceiling heights are generally somewhere between these heights. This makes installation in your home or garage an attractive option.
- Width: 60cm is about the minimum. You need enough room to grip both hands side by side at the width of your shoulders. If you have room for a wider board you can add different types of rungs to target different types of training.
- Angle: A relatively vertical angle will provide great upper body training, similar to (but better than) a pull-up bar. A more overhung angle will target finger, forearm, shoulder, and body tensile strength. Vertical angles should be overhung just enough so your body does not drag up the side. 10 degrees from vertical is about the minimum. Angles between 15 to 20 degrees work well for training boards.
Calculations
The best approach is to let the anchor height (which is the height above the floor that the board begins) and the angle you have chosen, be the determining factors for the length of the campus board. In other worlds, calculate the length of the board, rather than let a fixed campus board length determine the anchor height. There are a number of advantages to this approach. If the campus board is anchored below about 120cm that area won't be much use. For most people, the height from their shoulders is about 120cm. Of course you can adjust the anchor height based on your body size, but generically 120cm is good starting point for most people.
The campus board should be constructed with 2X4 (50x100mm) framing with the studs 400mm apart. Screw the frame together - do not use nails, they work loose. The plywood sheeting lays over the framework and is also screwed to the frame. You can also use wood glue when connecting the sheeting to the frame. This keeps the campus board from squeaking as you work out. Cut the ceiling header at the same angle as the campus board. The support wood should be at least 2x4. Securely fasten the ceiling header to ceiling joists. The ceiling header will have both vertical force and a horizontal force. Since the anchor at the bottom will handle most of the vertical force, make sure the ceiling header will withstand the horizontal force pulling out, away from the wall. Reinforce the ceiling header with 2X4s running perpendicular to the ceiling header, then attach plywood to reinforce the angle. The plywood should connect the perpendicular piece with the studs in the campus board. The wall anchor is straightforward.
Make sure it is very securely attached to the wall studs. The anchor will have vertical force. This needs to hold the weight of the climber as he or she works out - which can be be a momentary force several times greater than the weight of the climber. So, use a fastening system that will support the weight. You can use anchor bolts or large screws depending on the situation. The frame of the campus board must be constructed with the 20 degree angle built into the top to meet the ceiling and at the same 20 degree angle where the board meets the bottom anchor. This is absolutely necessary so the campus board seats tightly on the anchor and ceiling support.
Fall Zone
You've come this far - don't neglect the fall zone. Do not boulder over concrete, asphalt, wood, carpet or any other hard surfaces. Falls directly to an unprotected surface can result in serious head injury and even death. Even grass and turf will lose its ability to absorb the shock of a fall through wear and weather. You can also build up a thick fall zone using carpet pad remnants from a carpet store. Ensure that your fall zone is free of equipment or obstacles. Your fall zone should extend at least 200cm from the farthest part of your overhand. For ceiling height falls you need 30cm of padding - a crash pad/s is the obvious measure.